Superior Education
MOSAIC QUILTING
- ART
- CREATIVITY
- TECHNOLOGY
How to make your own mosaic quilt masterpiece
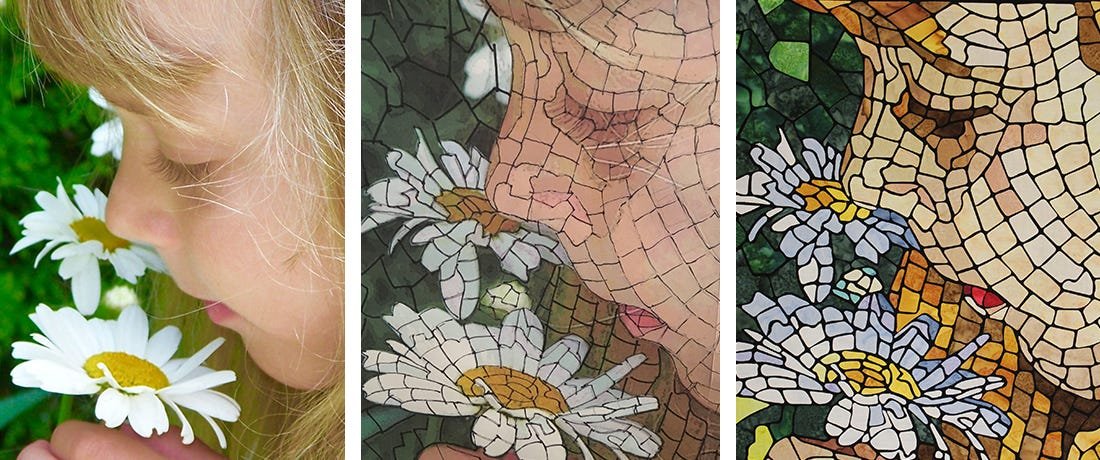
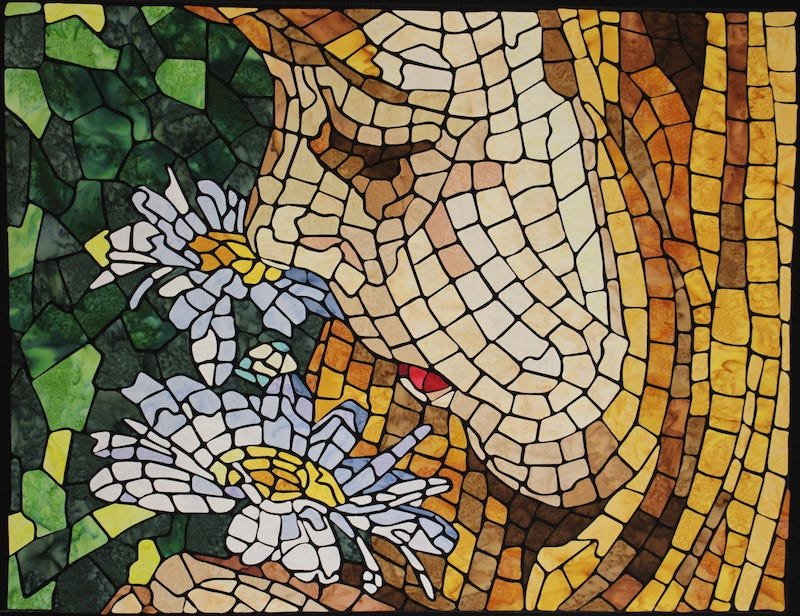
Every mosaic quilt that I create starts with a photograph that I have taken. From behind the lens of my camera, I focus on images and scenarios that bring about emotion. Some of my favorite photography subjects are of children, flowers and landscape. All three of these subjects draw emotion and trigger memories of times past. Once I have selected a photo to turn into a mosaic quilt, the fun begins.
The first step is to draw the mosaic pattern that I want to replicate as a quilt. From the hand-drawn design, I create a digital version of the mosaic pattern. During this process, I visualize and choose the fabrics that will achieve the perfect combination of shading, contrast and depth. To help with this process, I like to use a digital cutter, especially for the small pieces. All pieces are fused into place and free-motion stitched. It can be labor intensive, but the end result always makes it worthwhile.
Below are step-by-step instructions on how I make mosaic quilts. I hope you'll be inspired to create your own mosaic beauty.
Materials:
- Inspirational photo
- Assortment of light, dark and medium batik and hand-dyed fabrics for mosaic pieces
- Liquid starch (Terial Magic) or spray starch
- Pressure sensitive fusible web (Lite Steam-A-Seam 2)
- Freezer paper
- Digital Cutter and accessories (I use a Janome Artistic Edge 15”)
- Cotton fabric for background and backing
- Wool felt
- Lightweight stabilizer
- Lightweight fusible (Mistyfuse)
- Fine polyester threads (Monopoly and MicroQuilter)
- Chalk pencil and painter’s tape
- Fine tip Sharpie marker
Instructions
- Choose a Photo: Use an inspirational photo that is clear and has enough dark and light contrast.

- Edit the Photo:Use a photo editing software such as Adobe Photoshop Elements to adjust values,
contrast and crop if necessary. Resize your image to the desired quilt size and save as a .pdf file.
Tip: I find between 7-10 values works well.
- Printing: Copy the resized image onto a USB stick and print it using a large format printer at a
local print store.
Tip: You can also print at home, using your printer’s tile feature and tape the pages together. - Fabric Selection: Referring to both the edited image and the original photo, select fabrics based
on the values using a good assortment of light, dark and medium-valued fabrics. Choose tightly-woven
fabrics such as batiks or hand-dyed fabrics as these work best with a cutter.
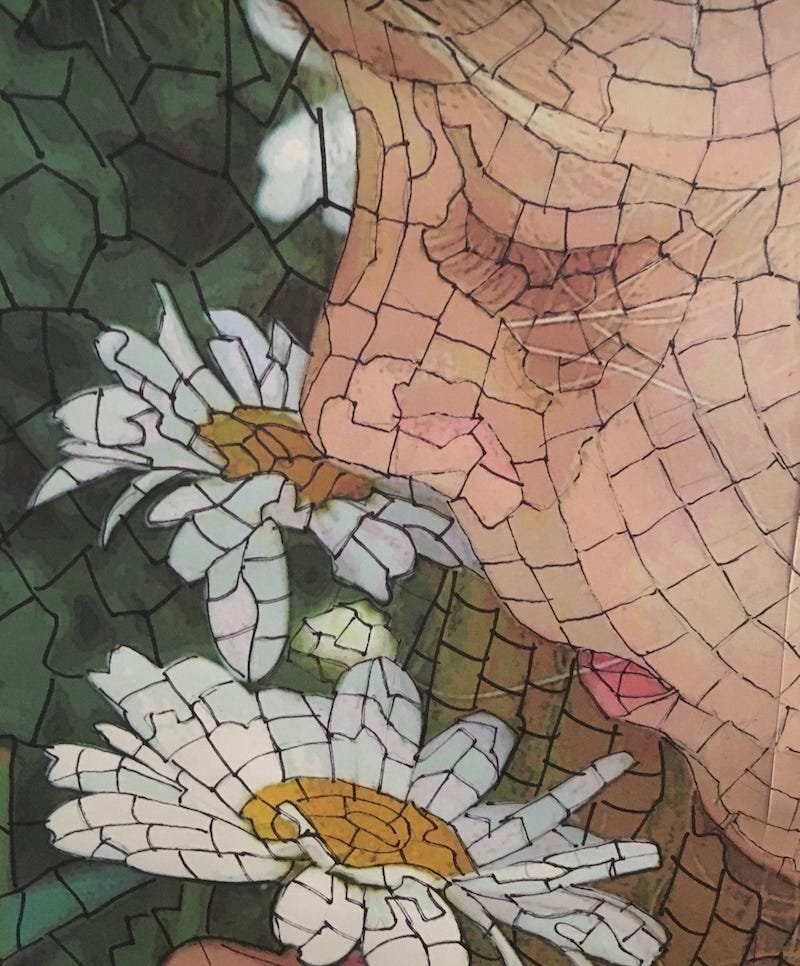
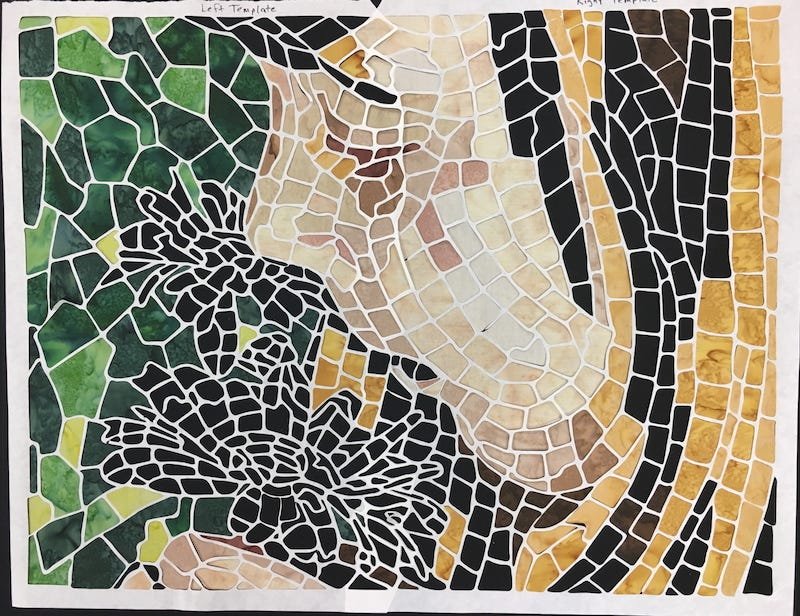
Tip: Be Creative. If the subject of your photo is wearing a red shirt, once you have defined the values, you can easily swap out the red values to blue values. - Draw the Mosaic: On the resized printed image, use a fine tip marker to draw shapes. Define the
contour lines and fill each section with mosaic shapes (square, rectangular or irregular). Make a
full-sized mosaic design. Once the design is drawn, scan and save it on your computer. If your design is
larger than your printer have it scanned at a local print shop.
Tip: You can also put the drawing up on a design wall, take a quality picture of the design and save it to your computer.
For the next few steps, refer to your digital cutter’s instructions on importing, tracing and exporting designs, working with cutting mats, blades and fabric preparation.
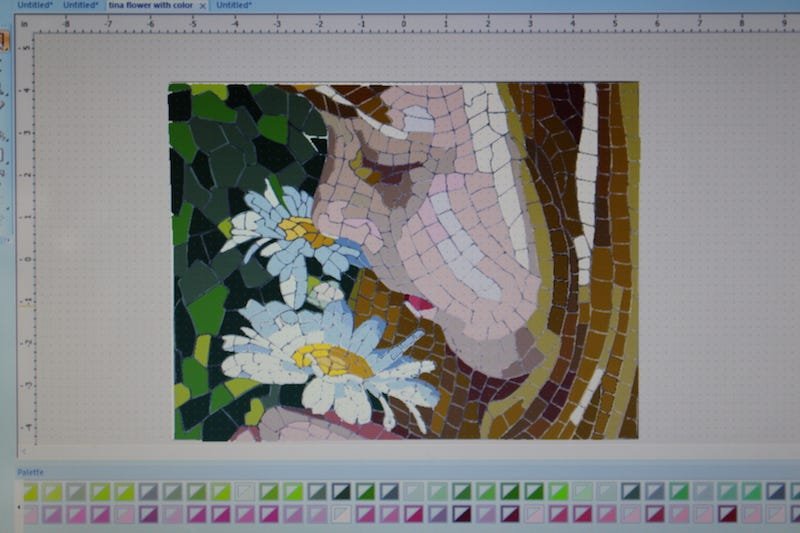
- Tracing & Creating a .SVG file: Open your saved design in the Digital Cutter’s Software or open
it with a Vector Drawing App on an iPad. Since you will be tracing on top of the design, the design
should be opened as a background image. Trace each shape of your design. Once the tracing of your design
is finished, save it to your computer. Note: Your cutter’s software will save the file as a cutting file
but if you are using a Vector Drawing App you will need to export it and save it as an appropriate file
type, such as a .SVG file. The file type must be one that is recognized by your digital cutter.
Tip: Your software may include an auto trace feature and this works great for many designs but it may have difficulties processing large complicated designs. You can also try auto tracing designs with other software programs such as Inkscape or Adobe products.
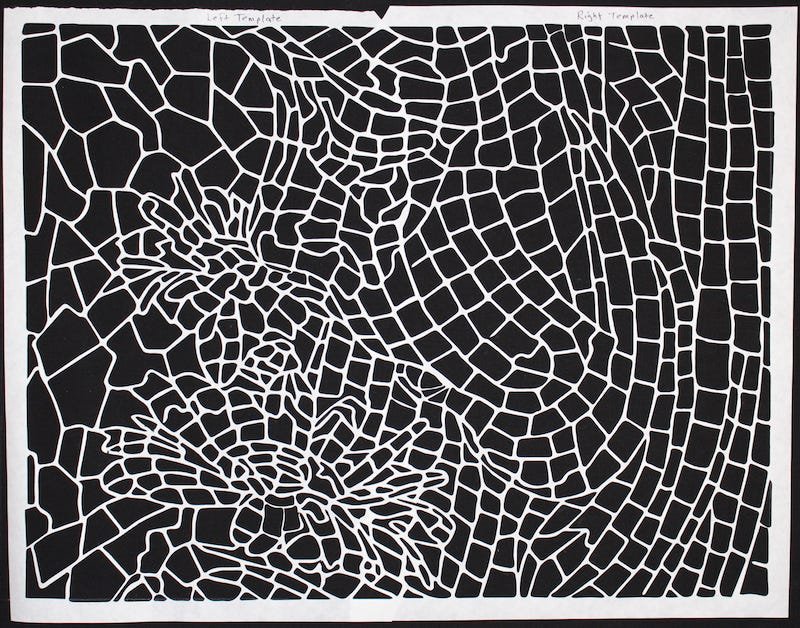
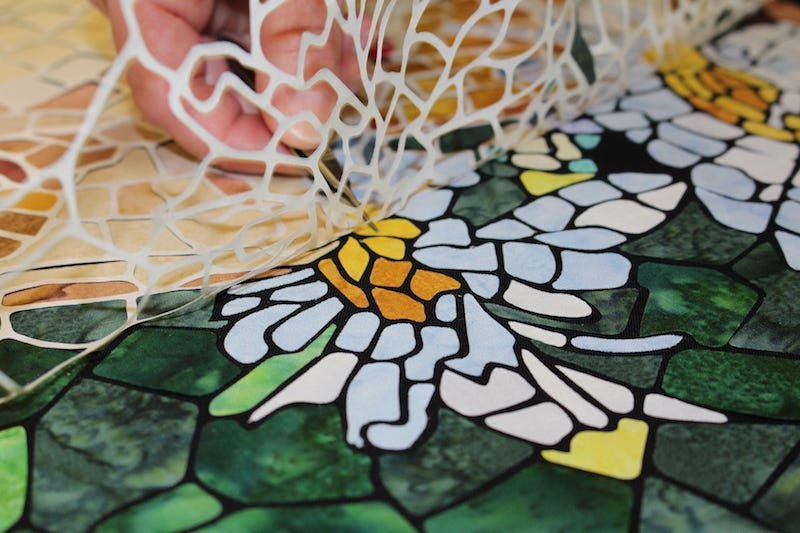
- Prepare templates: Break the entire design up into sections, especially for larger quilts. Each section should be no larger than the cut area on the cutting mat. Your templates are made using freezer paper. Place the freezer paper shiny side down on the cutting mat. Using the digital cutter, cut each of the templates for the entire design. Carefully lift the templates from the mat and discard the little cut pieces left on the mat. The cut templates will act as your placement guides for the fabric pieces. Note: Cutting mats have a light tack to them which temporarily adheres the freezer paper or fabric to the mat necessary for cutting.
- Background Fabric: I prefer black cotton fabric for the background. Black fabric dramatically
separates the appearance the fabric mosaic pieces. On the background fabric, using a chalk pencil, mark
an outer border the size of the final dimensions of the mosaic design.
Tip: Try experimenting with different background fabrics, each will have different effect on the overall appearance of your mosaic. - Assembling Templates to Background Fabric: Assemble the freezer paper templates on the background
fabric matching up your design and with the marked border. To stabilize the templates, use painter’s
tape or lightly iron the freezer paper templates shiny side down onto background fabric.
- Fabric Preparation and Cutting Mosaic Pieces: Prepare the fabrics using either Terial Magic or spray starch. Next, using your starched fabrics, refer to the cutter’s software for the dimensions of your selection. Cut your Lite Steam-A-Seam 2 to the dimensions. Press using (no steam) the Lite Steam-A-Seam 2 to the starched fabric. Then trim the fabric around the outside dimensions of the adhered Steam-A-Seam. Remove the paper from the backside and place the fabric adhesive side down on the cutting mat. Then using the digital cutter, load the mat, align the laser and begin cutting the selected fabric pieces for your templates.
- Filling the Templates: Working one template at a time, using tweezers, lift each of the cut
fabric pieces off the cutting mat inserting the pieces into the empty sections of each template. Set
aside the leftover uncut sections of fabric as you may need to recut additional pieces.
- Fusing: After the templates are filled with fabric pieces, using tweezers, carefully lift and
remove them. Make any necessary adjustments to the fabric pieces. Press the fabric pieces with iron
using (no steam) to temporarily fuse them in place. Once the entire mosaic is temporarily fused to
background transfer it to a large iron surface and press the entire design using (steam) to permanently
fuse the mosaic pieces to your background fabric.
- Assemble the Quilt: Apply a layer of Mistyfuse between each layer of your quilt sandwich. To assemble, fuse the mosaic top to stabilizer, then fuse the stabilizer to the wool felt, fuse the cotton backing to the other side of wool felt. Do a final pressing of the entire quilt sandwich to ensure that all layers are adhered and stabilized.
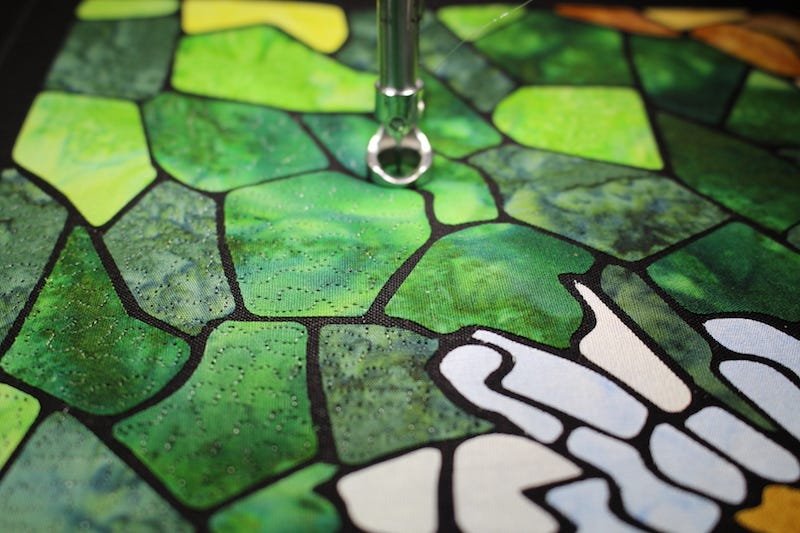
- Quilting Design: Free motion quilt your design. I prefer starting and ending with a travel stitch
on and off each mosaic piece. While on a mosaic piece, I use a random stippling stitch. The stitching is
done very close to the edge of each mosaic piece to prevent lifting. For threads, I prefer to work with
Superior Thread’s MonoPoly clear
polyester as the top thread and MicroQuilter, an extra-fine weight thread in the bobbin. These
threads are a very fine and almost disappear in the fabric providing just enough texture while still
making the mosaic itself the primary element of the design. Quilting can be done on either a domestic
sewing or mid-arm machine.
Tip: Using this combination of threads eliminates having to change thread spools often.
If you are interested in using a digital cutter, do your research. There are a number of digital cutters and software options available. Get to know the different features and file formats they use to cut and create designs.
 View Our Product Catalog